This is a classic but I feel it deserves a place on here for anyone who’s not yet discovered it! Shaving Foam Marbling is a way of making patterns on card using a fun sensory material. This is a gloriously messy craft!
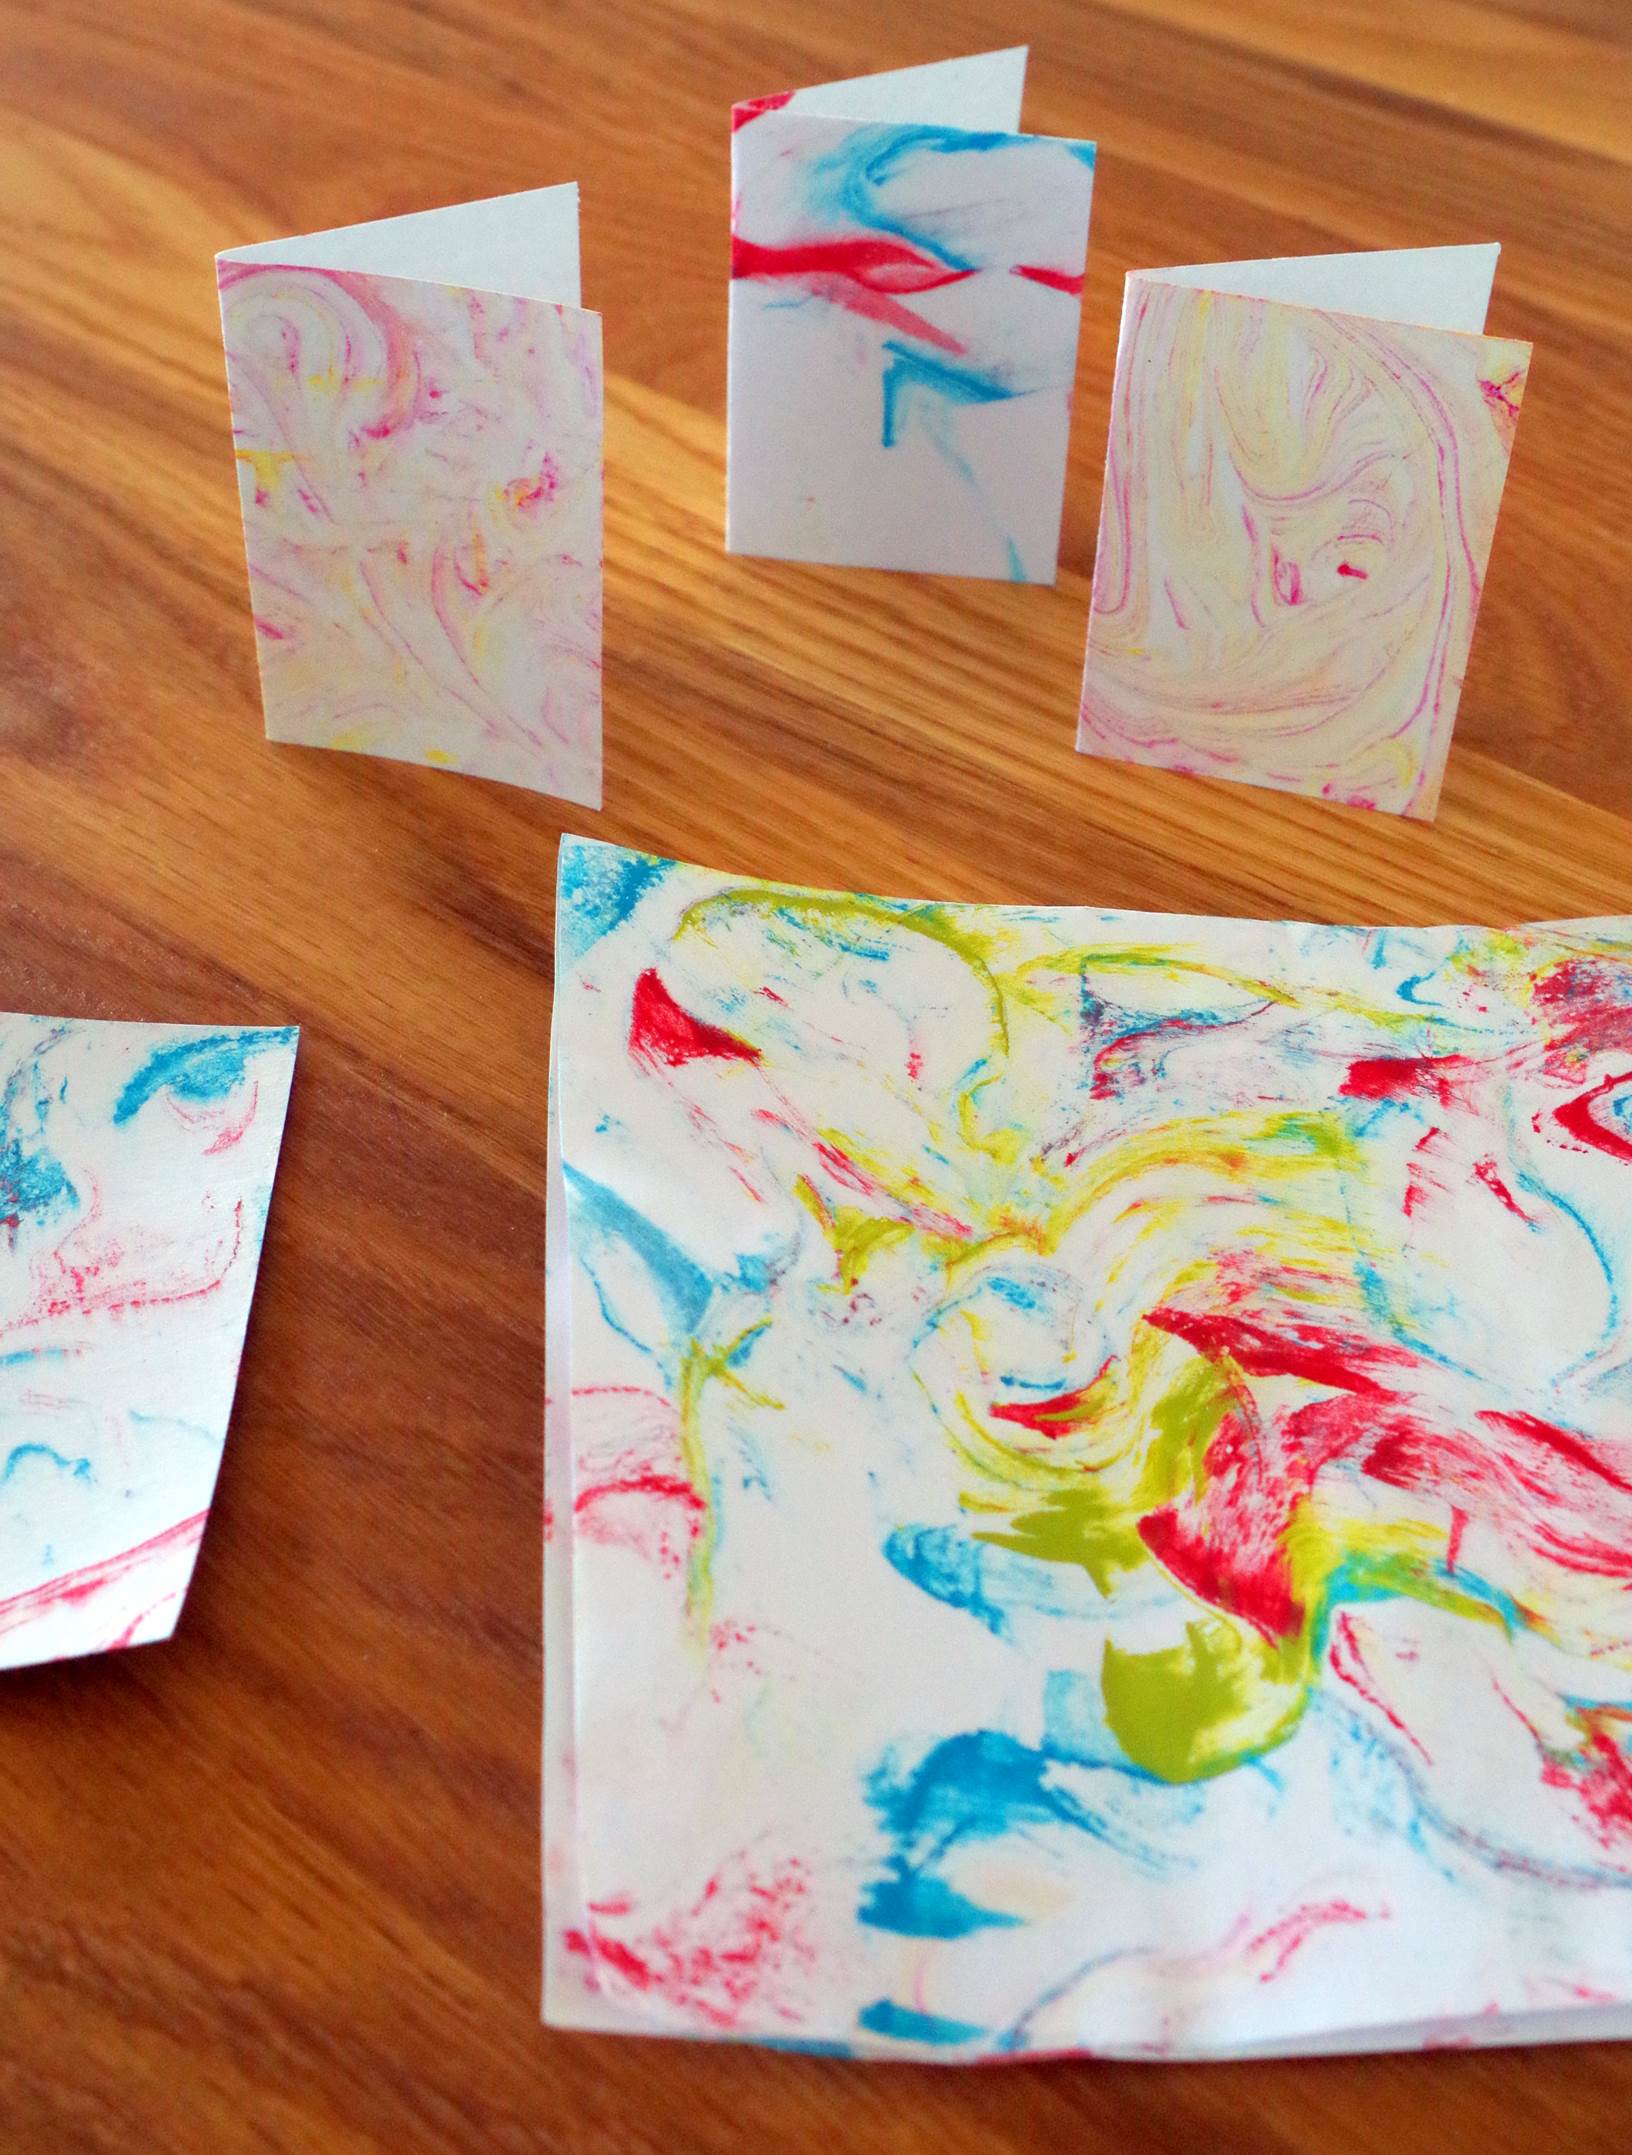
As you’ll see in some of the pictures I’ve used small white card stock folded in half to make gift tags. You can use shaving foam marbling for anything. There are a few ideas at the end of this page.
Stuff Needed:
- Shaving foam.
- White card (You can use white paper but I find card more effective for this activity).
- A tray big enough to fit your card either whole, or folded in half.
- Water-based paint or liquid food colouring.
- (Optional) Lolly sticks or a metal spoon for swirling paint into the foam.
- Something to protect your surfaces! If you don’t have wipe-clean table cloths, you can use bin liners cut open.
Instructions:
- Prepare your space. Shaving Foam Marbling is a messy activity so it’s best to prepare your space carefully before you start. You will need a space to do the activity, a table for wiping off the excess foam afterwards, and somewhere to dry the finished art. Cover the spaces with a wipe-clean table cloth or bin liners. Put a bin near the wipe-down space.
- Cut a couple of pieces of card for ‘scraping off’. They should be at least the width of the card you’re using.
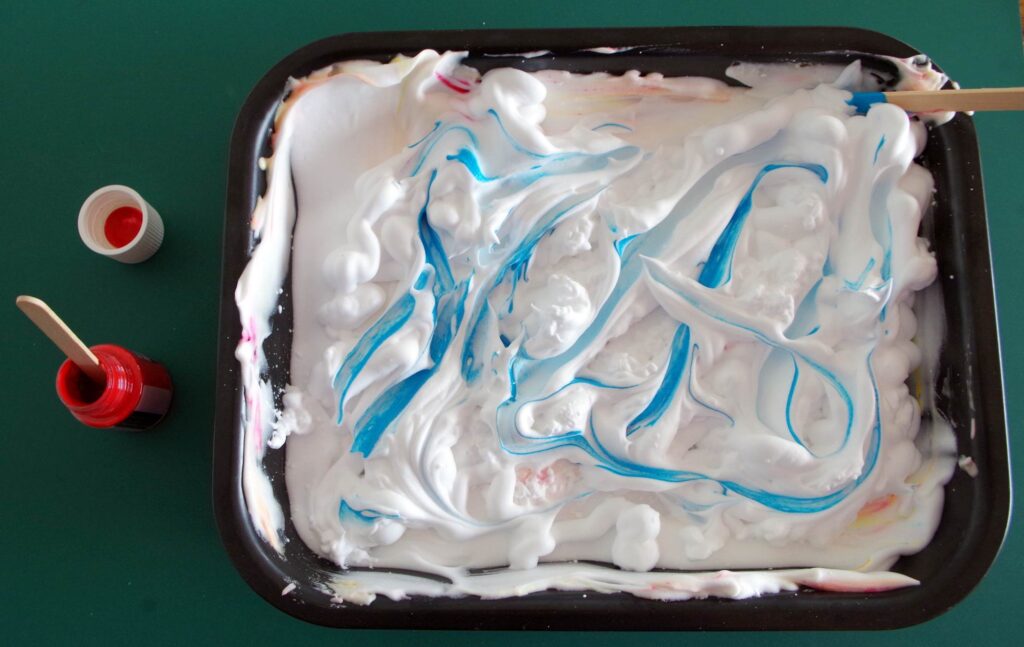
- Squirt some foam into the tray and spread it around until the base is covered.
- Add a small amount of colour and swirl it around. Press gently so the base of the tray remains covered. Add more colours if you want to.
- Place a piece of card on the surface of the foam and push down gently to make sure it makes full contact.
- Pick up the card carefully, then take it to the scraping off area.
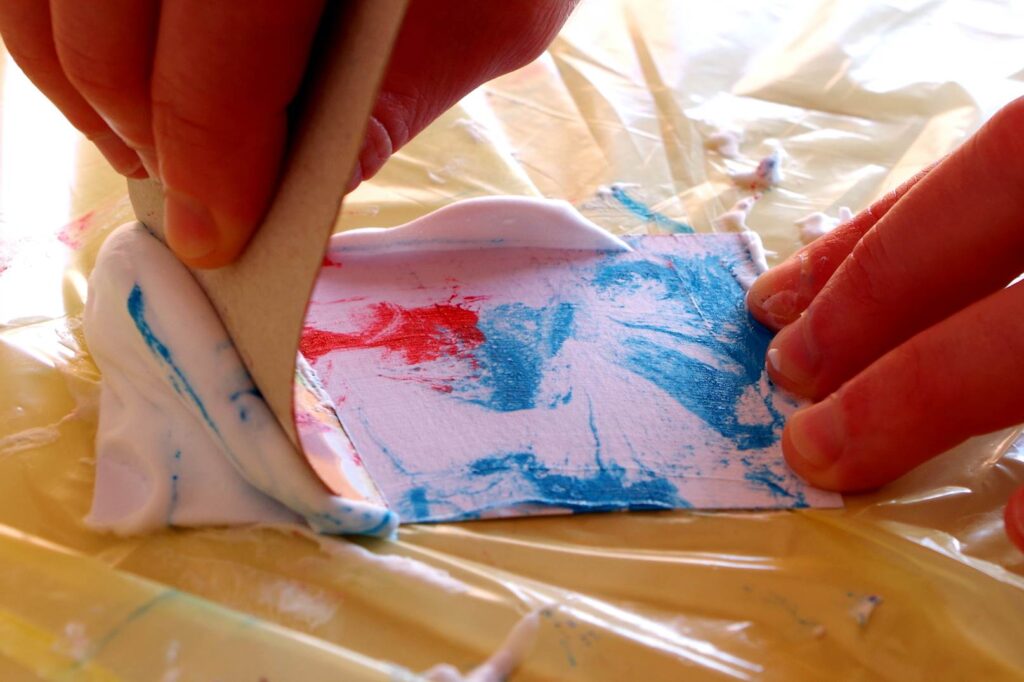
- Using the edge of a piece of cardboard, scrape the foam off the surface of the card. Don’t worry if you miss a small amount, it will disappear as it dries.
- Leave the marbled card to dry completely. Make some more! You can keep using the same foam. Add more colour if you need to. If it starts to get a bit ‘muddy’ add some more foam. If you’re hoping to do a lot of marbling in one go, it helps to stick to either ‘warm’ colours or ‘cold’ colours.
Things to do with Marbled Card
When you’ve finished your cards, leave them to dry completely. After they’ve dried, here are a few ideas you could use them for to turn them into another art project:
- Cards. If you folded your card in half as shown in one of the examples above, you could write inside and use it as a gift tag (if it’s a small card) or a greetings card. You could still do this if you didn’t fold your card in half, you’ll just have a decorative back to the card as well as front!
- Backgrounds. The swirls can look a bit like a sky at sunset or at night time (depending on the colours you’ve used). You can cut out shapes from black paper to make a silhouette scene to stick onto the marbled sky. Buildings or trees work well for this.
- Bookmarks. If you cut your marbled design into a long, straight shape, you can back it on thicker card or laminate it to make it into a bookmark. You could punch a hole in one end and add some wool or ribbon to make a tassel.
- Under the sea picture – if you use blues and greens or purples in your marbling, you could turn it into a sea picture afterwards by adding fish, and seaweed cut from coloured paper.